Guides
Restoring original wood windows for a Canadian freeze-thaw winter
Original wood windows handle Canadian freeze-thaw winters when air sealing, weatherstripping and storm panels are fitted before the first hard freeze.
What to take away
- Most heat leaves an old window through air leaks at the sash, meeting rail and frame, not through the glass.
- Single glazing plus a tight, vented storm sash usually matches a mid-grade sealed replacement on air leakage, and it can be repaired.
- The National Building Code of Canada is a model code; your province adopts and amends it, so ask your municipal building department what your renovation triggers.
- Weatherstripping is the cheapest gain and the most reversible. It does not alter the sash profile, which matters if your house is designated.
- Condensation on room-side glass is a humidity signal. Frost inside the storm cavity is a drainage signal. Work air leaks first, then humidity, then drainage.
- Seal, strip and fit storms before the first hard freeze. Putty and sealant need dry weather and moderate temperature to cure.
Why old sash outlast replacements in a freeze-thaw climate
Water gets into a joint, freezes, expands, then melts and drains. Do that dozens of times between November and April and any assembly that traps water will fail.
Old sash were cut from dense, slow-grown pine, fir or cedar, joined with mortise and tenon, and given a drying path. A cracked rail can be spliced. A rotted sill can be scarfed in. The unit stays in the opening.
That repairability is why these windows reach a century. Sealed insulated glass units depend on a perimeter seal that flexes with every temperature swing. When the seal goes, moisture enters the cavity and the unit fogs. The frame may be perfectly sound, but the glass is an assembly you cannot open, dry or repair.
Repair follows a set order. Cut rot back to sound wood, dry the cavity, and splice in a matching species with a scarf joint and waterproof glue. Epoxy consolidants such as Abatron LiquidWood and WoodEpox rebuild small sections that cannot take a new piece of wood.
Reglazing is a bench job if you can take the sash out. Remove the old compound, bed the pane in a linseed-oil putty or DAP 33, and drive glazier's points. Tool the putty to a bevel that sheds water, let it skin, then paint onto the glass by about 1/16 inch.
Wood also buffers moisture, absorbing and releasing vapour slowly and moderating the extremes at the joint. Vinyl and aluminium do not buffer. They move with heat and cold at different rates from the glass, which stresses seals and gaskets.
Heritage status adds a practical reason to keep the sash. If your house sits on a municipal heritage register or inside a designated district, heritage legislation can require a permit before you alter character-defining features. The Ontario Heritage Act and the Quebec Cultural Heritage Act are two provincial examples. Windows are almost always on that list.
The rules on permits and local codes vary by municipality, but the safe assumption is that replacement needs approval and repair does not.
Cost is the other argument. Replacing a dozen openings is one large capital project with one large disruption. Repair, reglazing, weatherstripping and a storm panel are staged work you spread across seasons, which is why the realistic timeline for a wood window project is measured in weekends and drying time rather than a single install day.
Glazing choices and what each one buys
Typical use
- Single glazing, restored
- Heritage sash kept in place
- Single glazing plus exterior storm
- Most cold-climate retrofits
- Single glazing plus interior storm
- Heritage-sensitive interiors
- Double glazing in a new sash
- Full rebuild of the unit
- Double glazing in a storm panel
- Retrofits where the original sash stays
Strength
- Single glazing, restored
- Authentic, repairable, cheap to reglaze
- Single glazing plus exterior storm
- Adds an air space and a second barrier
- Single glazing plus interior storm
- Keeps the exterior profile unchanged
- Double glazing in a new sash
- Better centre-of-glass value
- Double glazing in a storm panel
- Improves performance without touching the sash
Limit in a Canadian winter
- Single glazing, restored
- Low insulation value; condensation on cold glass
- Single glazing plus exterior storm
- Needs correct venting and a tight frame
- Single glazing plus interior storm
- Can trap moisture if the interior is too airtight
- Double glazing in a new sash
- Sealed unit can fail; heavier sash needs new hardware
- Double glazing in a storm panel
- Panel weight and mounting need care
Single glazing sits at about R-1 at the centre of glass. In a Canadian January the room-side surface drops cold enough to condense moisture from ordinary indoor air. That is physics, not a defect. The fix is a second layer of glass or lower indoor humidity.
Glazing options for Canadian winters
Single restored
- Insulation
- R-1
- Condensation
- On cold glass
- Repairability
- Reglaze cheaply
- Heritage fit
- Authentic
- Failure mode
- None added
Single + storm
- Insulation
- Adds air space
- Condensation
- Less likely
- Repairability
- Panel removable
- Heritage fit
- Exterior profile kept
- Failure mode
- Needs venting
Double glazed
- Insulation
- Doubles centre value
- Condensation
- Edge effects remain
- Repairability
- Sealed unit can fog
- Heritage fit
- New sash or panel
- Failure mode
- Fogged cavity
Double glazing raises the centre-of-glass value, but edge effects and frame conduction cut into the real number. A sealed unit also adds one failure mode single glazing does not have: the fogged cavity.
A tight, vented storm over single glazing typically reaches about R-2 at the centre of glass and cuts window air leakage by about half. That is the honest comparison against a mid-grade double-glazed replacement. The value, upkeep and fit comparison usually favours the sash over a thirty-year horizon, because the sash can be maintained rather than replaced.
Natural Resources Canada publishes energy efficiency ratings for products so you can compare glazing, door and window parts on a common basis instead of a sales sheet.
Weatherstripping and air sealing that keep heritage sash in place
Weatherstripping is the highest-return work on an old window. It is cheap, reversible and does not alter the sash profile. The goal is to stop air moving through the gaps at the sash perimeter, the meeting rail and the frame.
Match the product to the gap and the movement:
- Spring bronze strip from Accurate Metal Weatherstrip or the spring bronze sold by Lee Valley, on the sash sides, where it wears well and stays put.
- Wool felt or a silicone bulb at the meeting rail; Pemko and M-D Building Products make bulb and kerf profiles.
- Closed-cell foam or EPDM at the frame-to-sash gap, where movement is small; Frost King tape is widely stocked.
- Interlocking metal or vinyl kerf weatherstrip in a routed groove, if you are willing to cut one; Pemko and Zero International sell kerf profiles.
- Caulking at the interior trim only, never sealing the sash into the frame.
Do not seal a sash so tightly that it stops moving. Egress, ventilation and cleaning all depend on operable hardware. Weatherstripping should cut draughts and leave the unit working.
Air sealing is the next layer and holds most of the real gain. The big leaks are usually at the frame-to-wall junction, under the sill and around the casing. Warm indoor air escapes there and cold outdoor air enters, so sealing those paths cuts both heat loss and the moisture that drives condensation.
Use caulking, backer rod and, where appropriate, low-expansion foam at the rough opening. Keep the interior face vapour-tight and the exterior face vapour-open, so any water that enters can dry outward. Sealing the exterior tightly and the interior loosely is the classic cold-climate mistake.
This is also where condensation trouble starts. Tighten a house without managing indoor moisture and the water finds the coldest surface. The winter condensation problem in Canada on old sash is usually a humidity and air-movement issue rather than a glass issue.
Natural Resources Canada publishes home energy efficiency guidance covering air sealing and retrofit sequencing for older housing. Read it before you buy materials.
Storm windows, the workhorse of a Canadian retrofit
A storm window is the single most effective addition to an original window in a cold climate. It creates a dead air space outside the sash, cuts air infiltration and lifts the interior glass temperature so condensation is less likely.
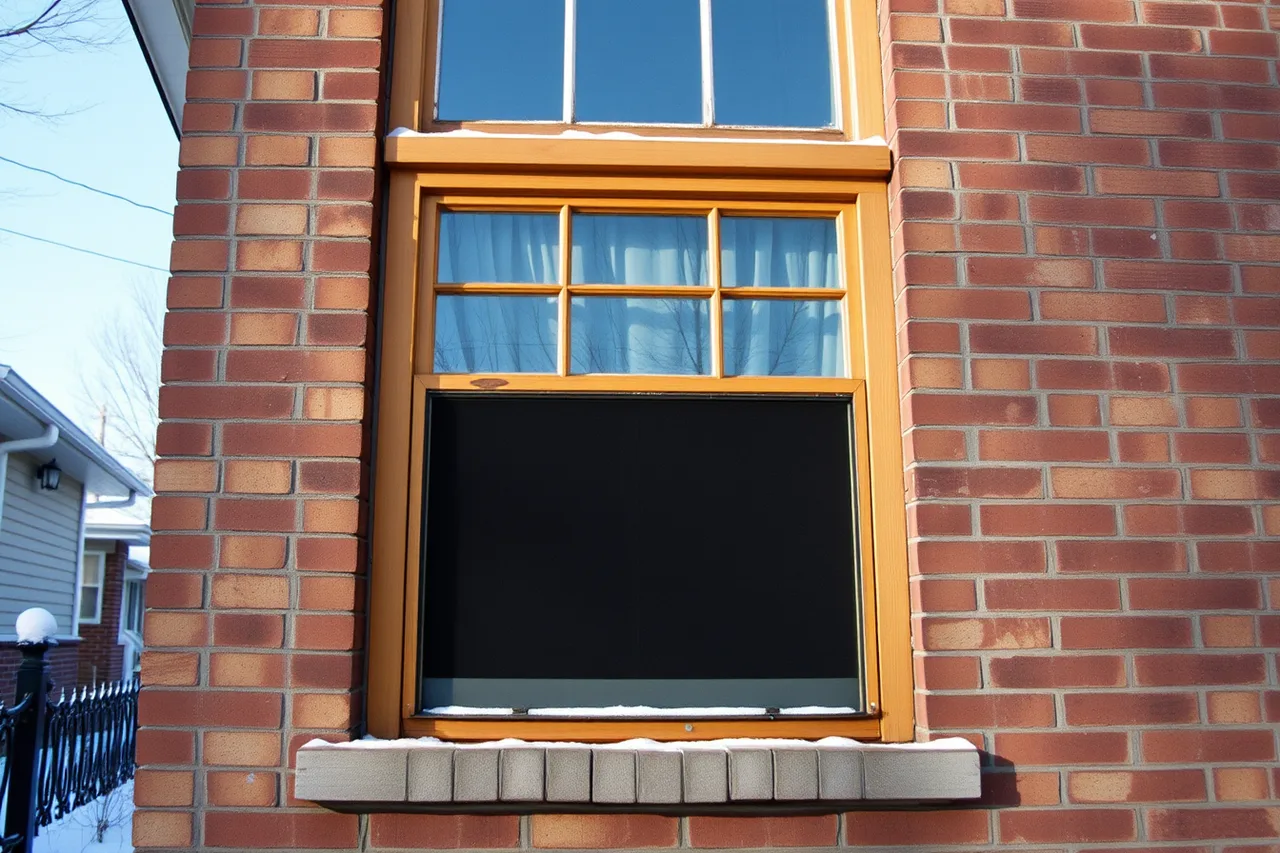
Exterior storms are the traditional Canadian answer. They protect the sash from weather, add a second barrier and can be removed or vented in summer. They need a frame that carries the weight, and they must be vented so the space between storm and sash can dry. A sealed exterior storm with no drainage is a rot machine.
Interior storms suit houses where heritage approval restricts exterior changes, or windows that are hard to reach. They are lighter and easier to install. The risk is trapping moisture between the panel and the sash, which shows up as condensation on the inner face of the primary glass.
A third option is a double-glazed storm panel, which gives you a sealed unit without altering the original sash. In a designated heritage building that is often the best compromise, because the character-defining sash stays in place. Custom wood storm panels come from millwork shops.
Loewen in Steinbach, Manitoba is one Canadian source that will build to a profile, and many local millwork shops will match a heritage sash.
Check any panel against ENERGY STAR Canada standards so you know what performance you are buying.
Fit matters more than the spec sheet. A storm that does not seal at the frame leaks as much as the window it protects. Check the perimeter gasket, the weep path and the latch hardware. If the panel rattles in a northwest wind, it is not doing its job.
Storms also change your maintenance cycle. Clean and inspect the cavity between storm and sash at least once a year, because that is where water and debris collect. Build it into the seasonal routine rather than treating the storm as fit-and-forget.
What the National Building Code of Canada asks of an existing house
The National Building Code of Canada sets minimum energy performance for the building envelope, windows included, in new construction and in work that triggers code compliance. It does not, by itself, order you to replace heritage sash in an existing house.
That distinction matters. The NBC is a model code, adopted and amended by each province and territory. In Ontario, the Ontario Building Code Part 11 covers renovation of existing buildings, and Supplementary Standard SB-12 sets energy performance for housing. Quebec's Construction Code, Chapter I, Part 11, plays a similar role.
What applies to your window depends on your provincial building code, your municipal property standards bylaw and whether your project is a renovation, an addition or a change of use.
Code energy expectations are usually expressed as performance targets for the envelope, sometimes a prescriptive table and sometimes a whole-house performance path. A renovation that triggers compliance may require the window assembly to meet a stated thermal value. Glazing choice, storm windows and air sealing are the tools that get you to that number without discarding the sash.
Natural Resources Canada publishes energy efficiency guidance for buildings explaining how envelope performance is assessed and where windows sit in the calculation. Read it before you talk to a designer or an energy advisor.
EnerGuide is the other tool worth knowing. An EnerGuide rating scores the house and identifies where the losses are, which helps you decide whether the money belongs in the windows, the attic or the air barrier. A figure from your own assessment beats a generic claim about window performance.
Check your provincial heritage act and municipal register early. In many Canadian jurisdictions an approved heritage permit can accommodate energy upgrades as long as character-defining elements stay.
That conversation is cheaper at the start than reversing work later. Your municipal heritage planner and, for tax questions, the Canada Revenue Agency or a qualified heritage consultant are the authorities to ask.
How repair and storms reach an envelope target
You can reach a meaningful envelope target while keeping the original sash. The measures are the ones set out above: repair, weatherstrip, air-seal, fit storms, manage humidity, then re-assess. What changes is the money and the schedule.
Envelope target without replacing sash
- Assess house with EnerGuide or blower door
- Repair sashreglaze, splice, free hardware
- Weatherstrip perimeter, meeting rail, frame gap
- Air-seal frame-to-wall and casing
- Add vented storm windows
- Manage indoor humidity through heating season
- Re-assess to confirm the number moved
Typical ranges, dependent on size, sash count, glazing and access: repairing, reglazing and weatherstripping one opening costs about CAD $250 to $600 in materials. A custom vented storm panel adds about CAD $200 to $500. A mid-grade double-glazed replacement installed runs about CAD $1,200 to $2,500 per opening. Over a dozen openings the two paths differ by five figures.
The repair path spreads that spend across several seasons. Repair and weatherstripping fit in one heating season, storms in another. Replacement is one large invoice and one large disruption. Access, sash size, paint condition and whether the sash can stay in the opening all move the number.
Owners who take this path rarely call it a compromise. The regret runs the other way, and the stories about replacing sash usually start with a sealed unit that fogged or a frame that could not be repaired. Keeping the sash keeps your options open.
Condensation, ice damming and the details behind both
Condensation on window glass is a humidity signal. Indoor air carries water vapour from cooking, bathing, laundry and breathing. When that air meets a surface below its dew point, it condenses. In a Canadian winter, single glazing and poorly sealed frames are the coldest surfaces in the room.
Where moisture appears
Where is the condensation?
Room-side glass -> air leaks or high humidity
Inner face of primary glass -> storm cavity needs venting
Ice damming is the roof version of the same story. Heat escapes into the attic, warms the roof deck, melts snow, and the meltwater refreezes at the cold eave.
The ice backs water up under the shingles. Windows are rarely the direct cause, but air leaking at window heads and through the ceiling plane feeds the heat that drives it.
The details behind both are predictable:
Condensation and ice damming
- Air leaks at the window frame carrying warm moist air into the assembly.
- Interior humidity left too high for the outdoor temperature.
- Exterior storms sealed with no drainage or venting.
- Insulation stuffed into a frame cavity with no air barrier, creating a cold path.
- Interior vapour barriers installed on the wrong side of the assembly.
- Blocked weep holes and sill drainage paths.
Where the moisture appears tells you which problem you have. Condensation on the room-side glass points to indoor humidity. Frost or water inside the storm cavity points to a venting or drainage fault. Water staining the sill or casing points to an exterior leak or a failed sealant joint.
A seasonal sequence before the first hard freeze
Timing matters in a freeze-thaw climate. Sealants, putty and paint all need dry weather and moderate temperature to cure. Work done in a cold snap fails early.
Before the first hard freeze
- Inspect every opening inside and out
- Repair rot and reglaze before sealing
- Let putty and paint cure fully
- Renew weatherstripping at sash and frame
- Air-seal frame-to-wall and casing
- Fit storms and check weep paths
- Test egress and set indoor humidity
Use this sequence in late summer and early autumn:
- Inspect every opening inside and out, noting cracks, soft wood, failed putty and loose hardware.
- Repair rot and reglaze before sealing anything, because sealant over a wet joint traps water.
- Let glazing putty and paint cure fully, which can take days to weeks depending on temperature and humidity.
- Install or renew weatherstripping at the sash perimeter, meeting rail and frame.
- Air-seal the frame-to-wall junction and casing, keeping the exterior vapour-open.
- Fit storm windows, confirm they latch tight and check that weep paths are clear.
- Test every sash and confirm egress windows still open freely.
- Set indoor humidity for the coming cold, then watch the coldest glass for condensation.
- Re-check the coldest glass after the first hard freeze and write down what you find, so next season starts from evidence.
A worked example shows how this plays out. Take a 1920s brick house in Ottawa with twelve double-hung openings. The owner starts in early September with a blower-door test showing the largest leaks at the window frames and the attic hatch.
Two weekends go to reglazing and splicing two rotten sills. Weatherstripping and interior caulking take another weekend. Exterior storms are ordered and installed in October, vented at the bottom.
Indoor humidity is set to a winter target and the owner checks the glass after the first cold snap. The sash stay in place, the house is measurably tighter, and next summer's work is maintenance rather than replacement.
The order is not optional. Repair before seal, seal before storm, storm before the freeze. Done in that sequence, original wood windows handle a Canadian winter the way they have for the last hundred.
Common questions
Do I need a heritage permit to weatherstrip my windows?
Usually not, because weatherstripping is reversible and does not alter character-defining features. If your property is designated or on a municipal register, confirm with your municipal heritage planner before you start.
Can single glazing meet the National Building Code of Canada energy expectations?
Not on its own in most cold-climate applications. Single glazing plus a well-fitted, vented storm and thorough air sealing is the usual route to compliance without replacing the sash. Your provincial building code and municipal building department set what applies to your project.
Which is better, an exterior or an interior storm?
Exterior storms protect the sash and are traditional in Canada, but they must be vented. Interior storms suit heritage restrictions and are easier to install, but they trap moisture if the interior is too tight. The right answer depends on your heritage constraints and how the cavity will dry.
Why does my window frost on the inside even after sealing?
Indoor humidity is likely too high for the outdoor temperature, or the storm cavity is not venting. Lower the humidity first, then check the drainage path. If frost sits inside the storm cavity rather than on the room-side glass, venting is the fix.
Does repairing windows affect my taxes or the Principal Residence Exemption?
Renovation-related rules and the Principal Residence Exemption are administered by the Canada Revenue Agency, and treatment depends on your circumstances. Confirm with the CRA or a qualified accountant before relying on any assumption.